1. Add basic event details
The first step is to add basic details of the event like the event name, city, venue address, and time-zone. Those basics lock your event URL, pre-fill calendar invites and drive the QR codes you’ll scan on-site.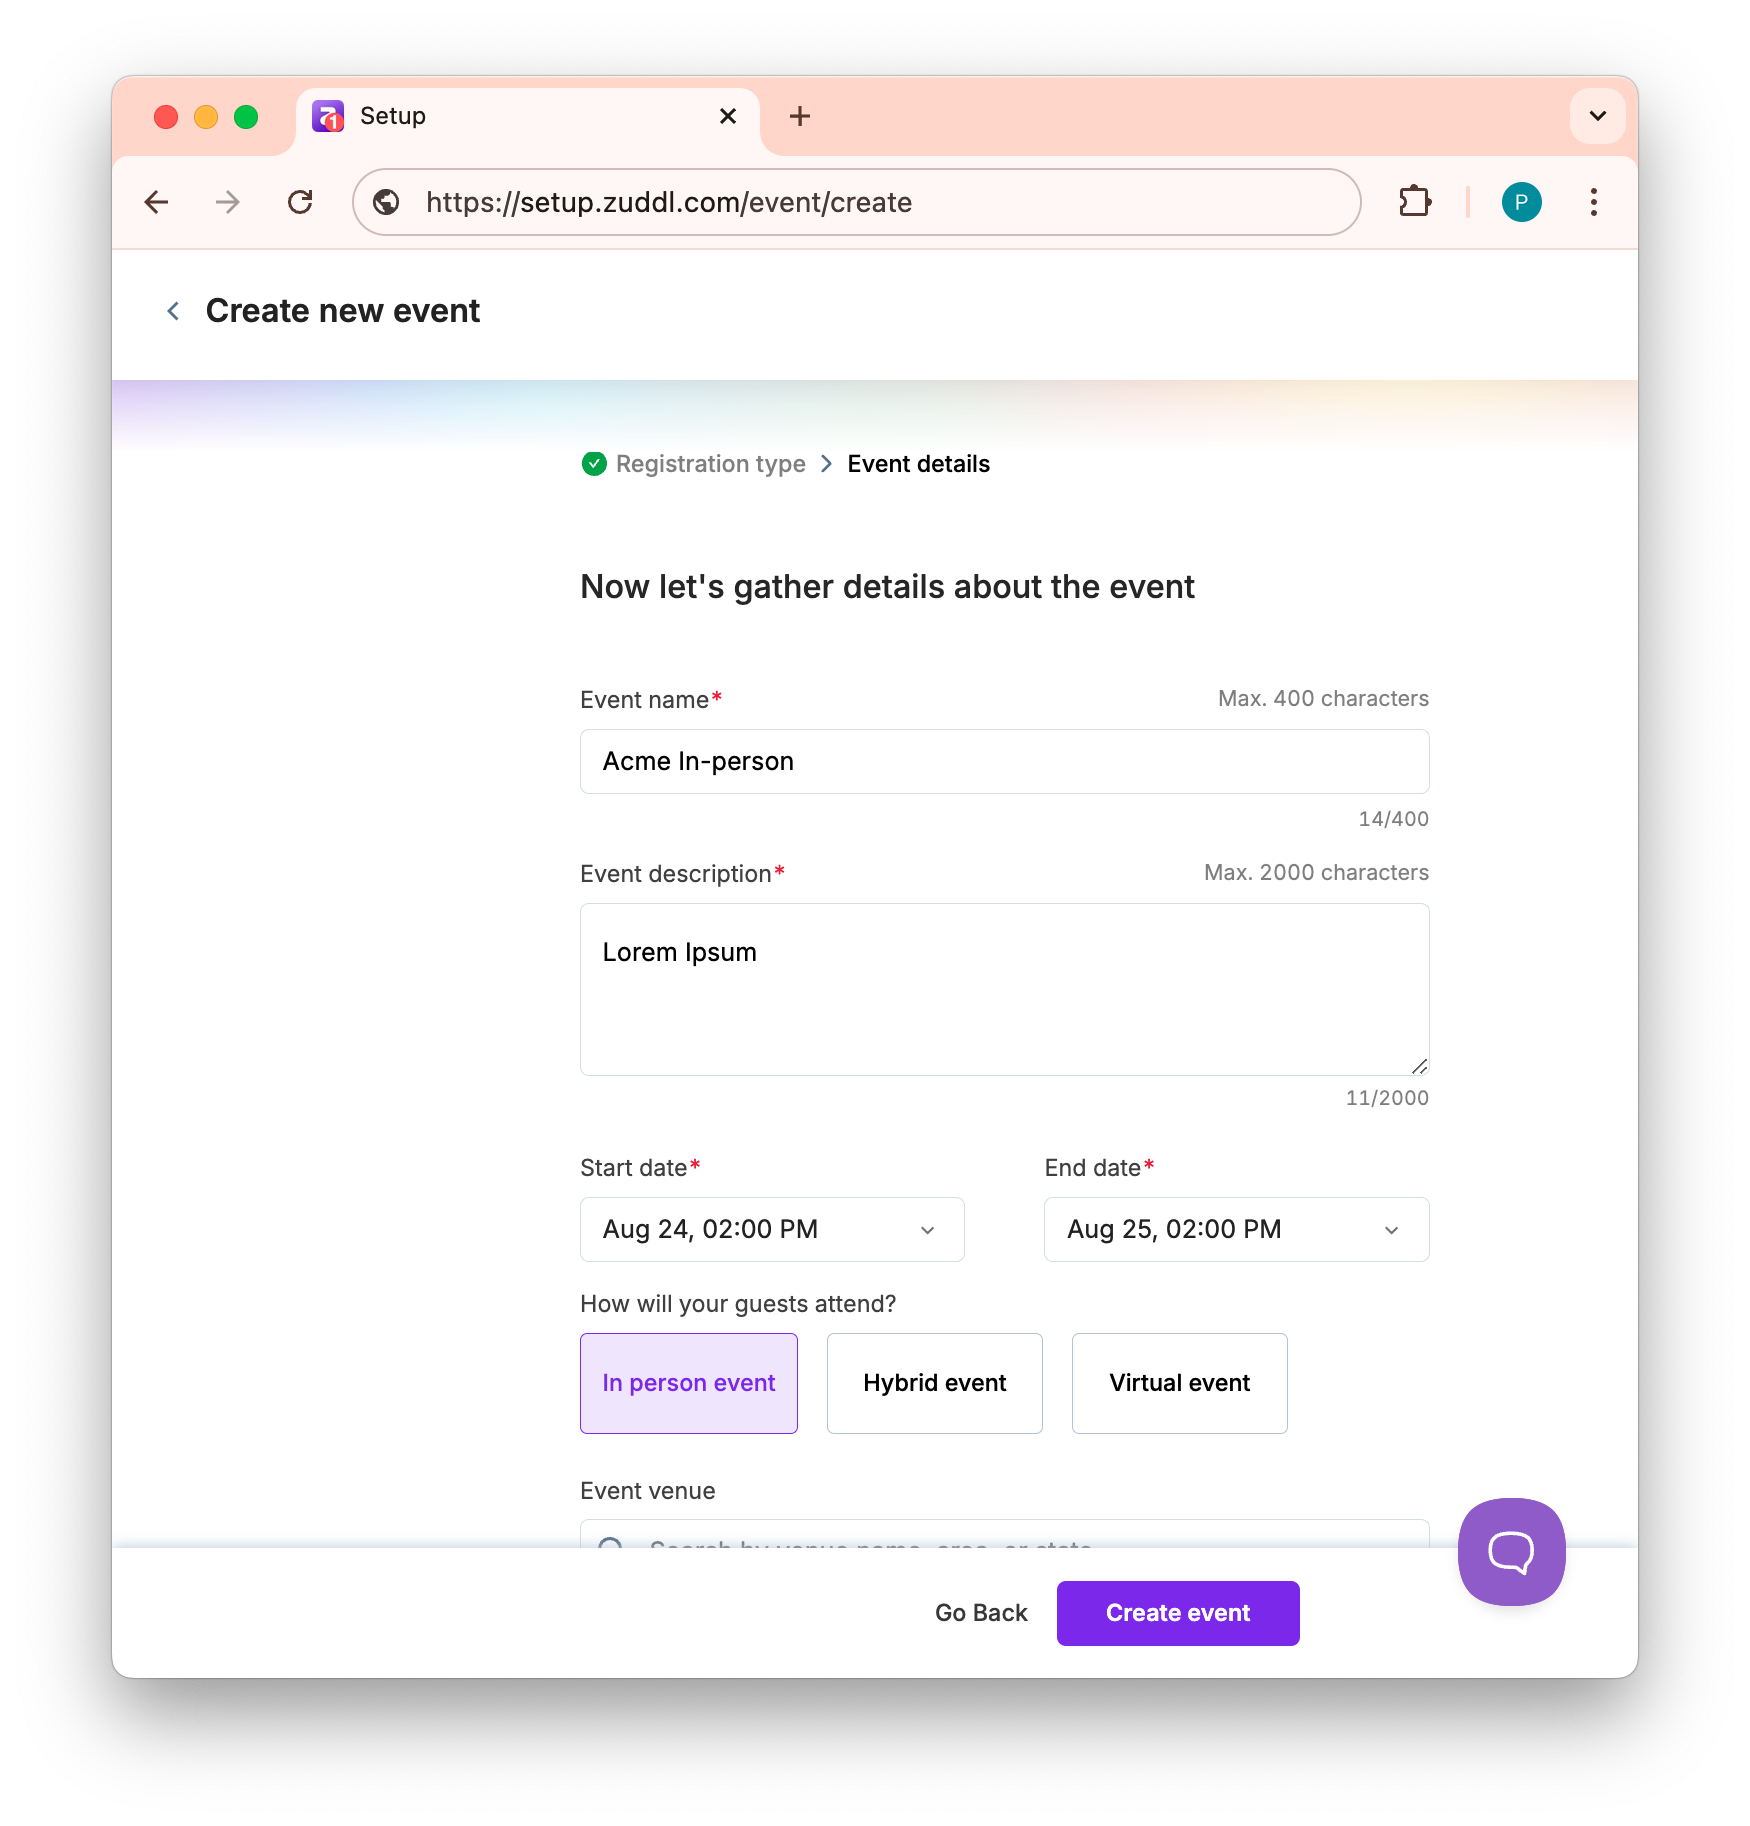
2. Build a mobile-first registration page
Using the registration page editor, drop in a hero image, set a theme colour, and drag speaker cards into place. In two or three minutes, you have an on-brand page without touching code.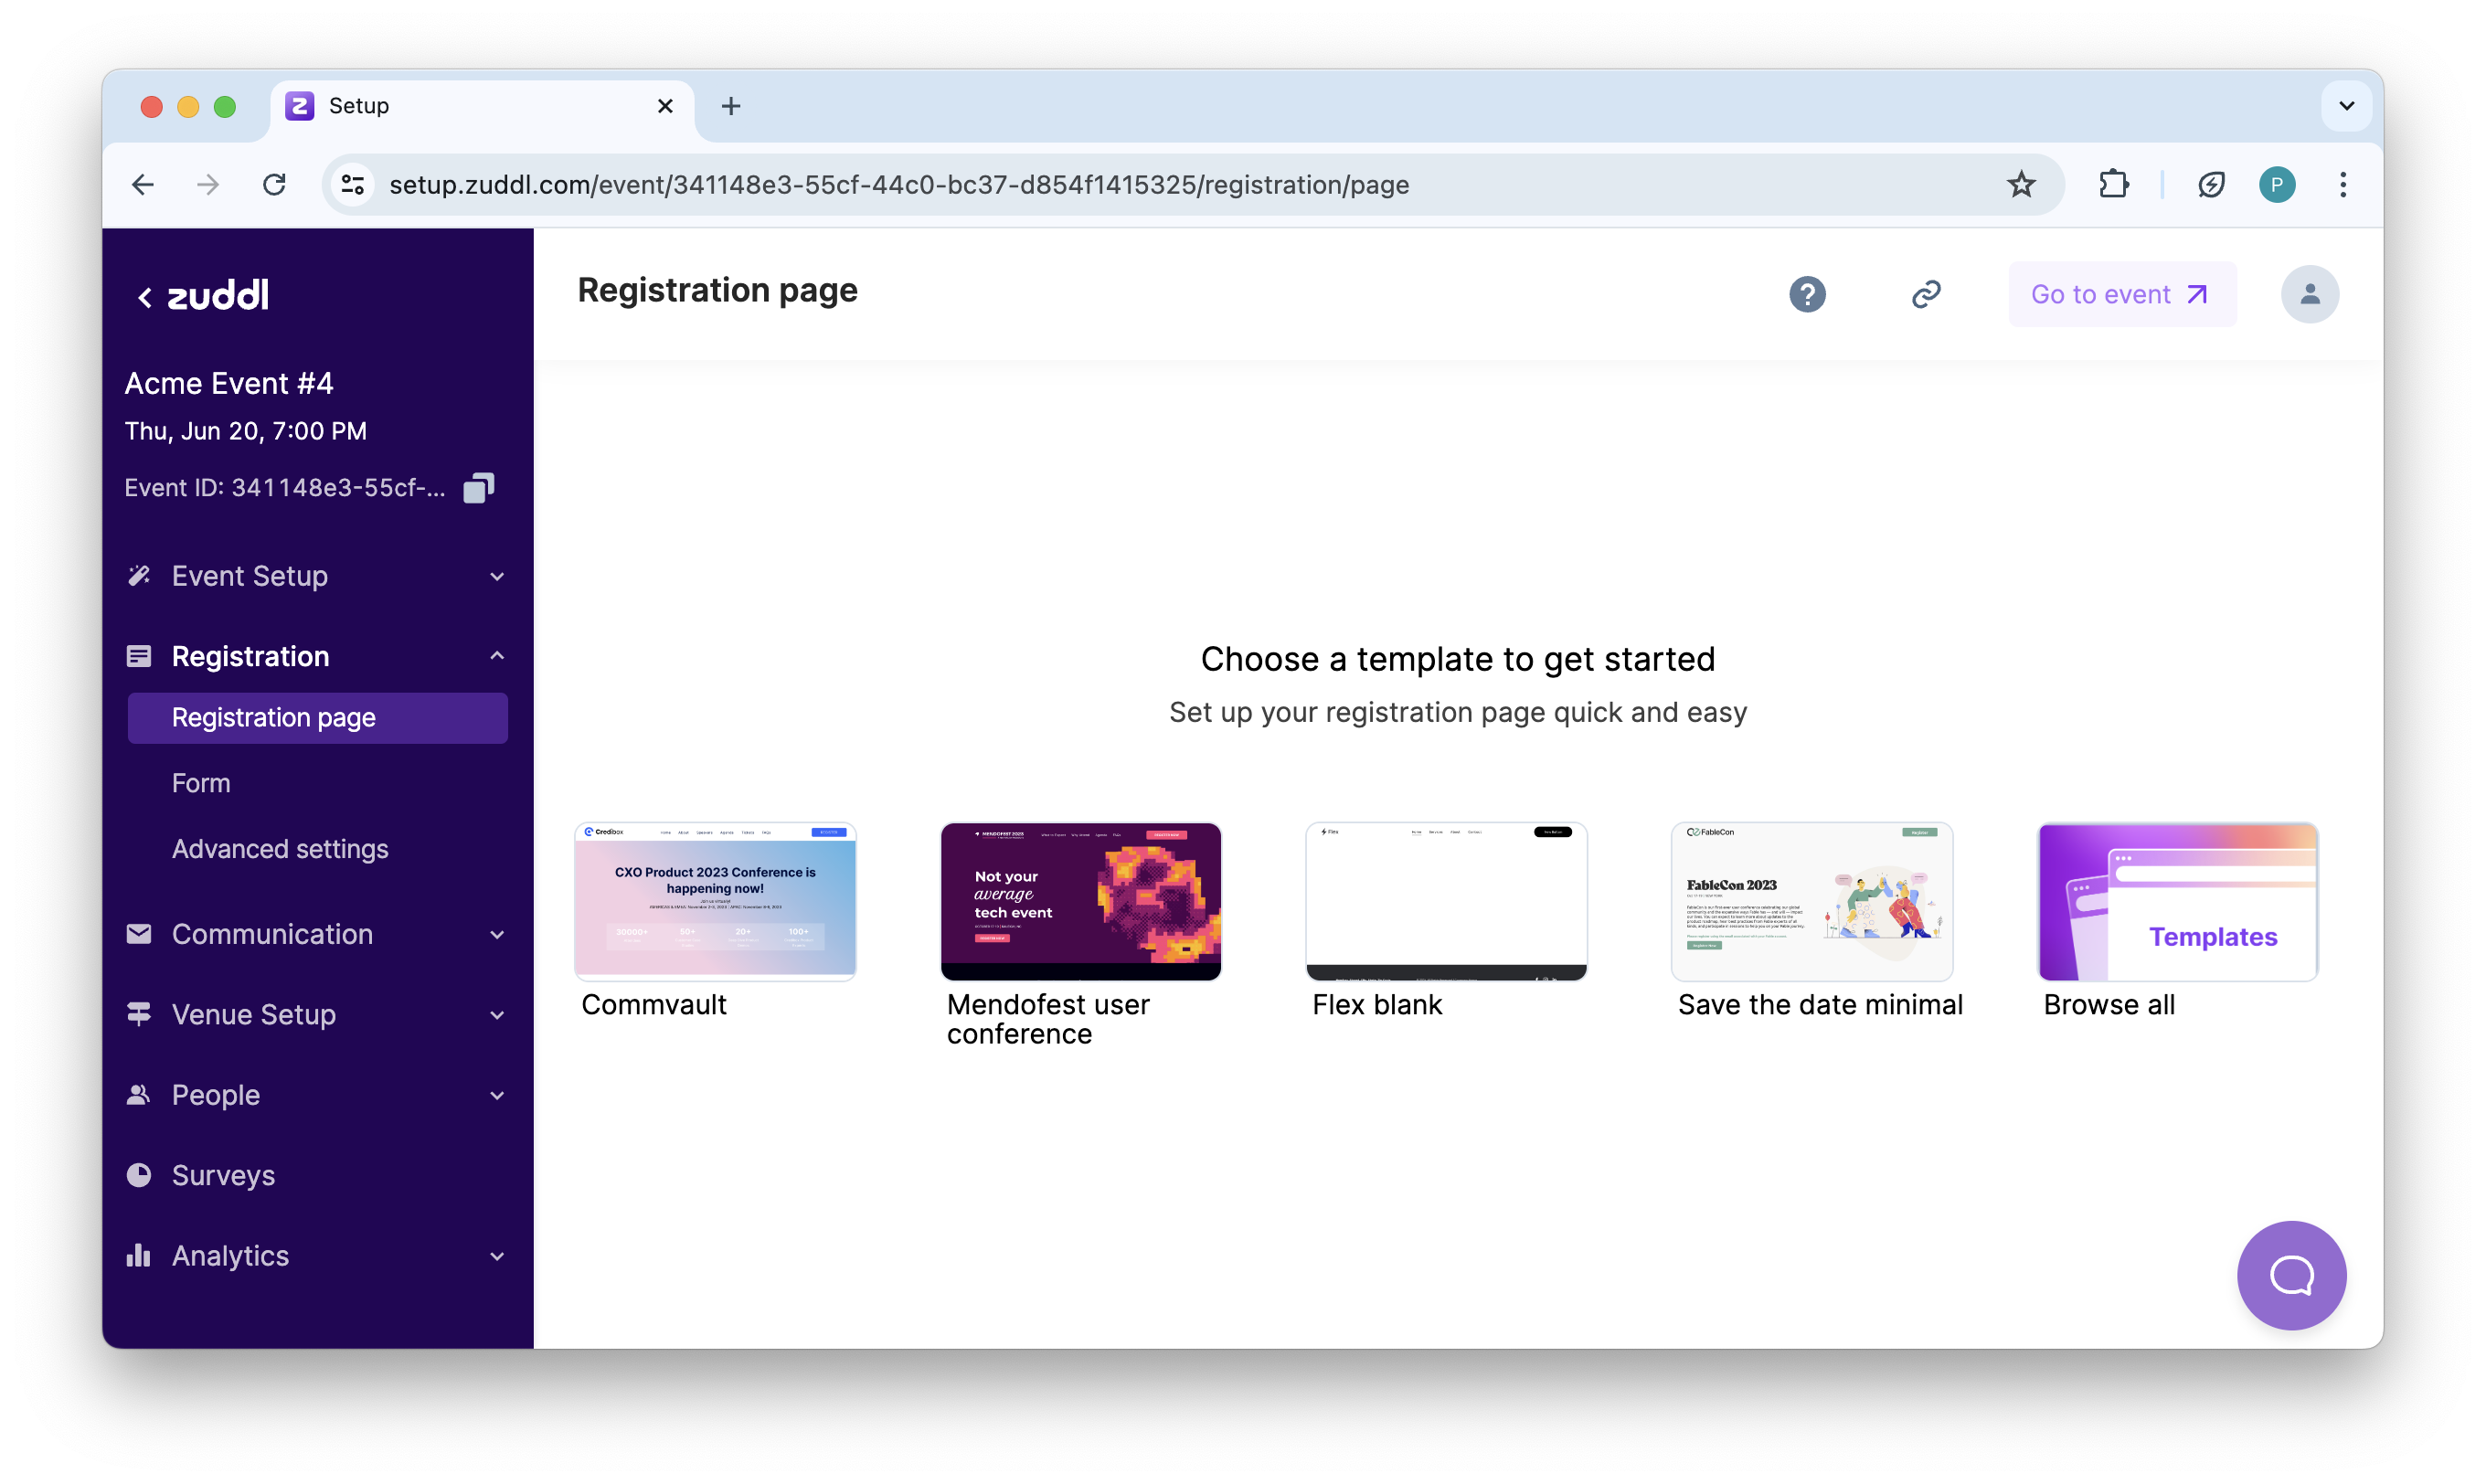
3. Configure registration flow
With Zuddl flow builder, you can add your form fields, disclaimers, and any ticket tiers—free, paid, coupon-locked, or invite-only. You can also add branches to your registration flow and direct users through different routes based on specific criteria.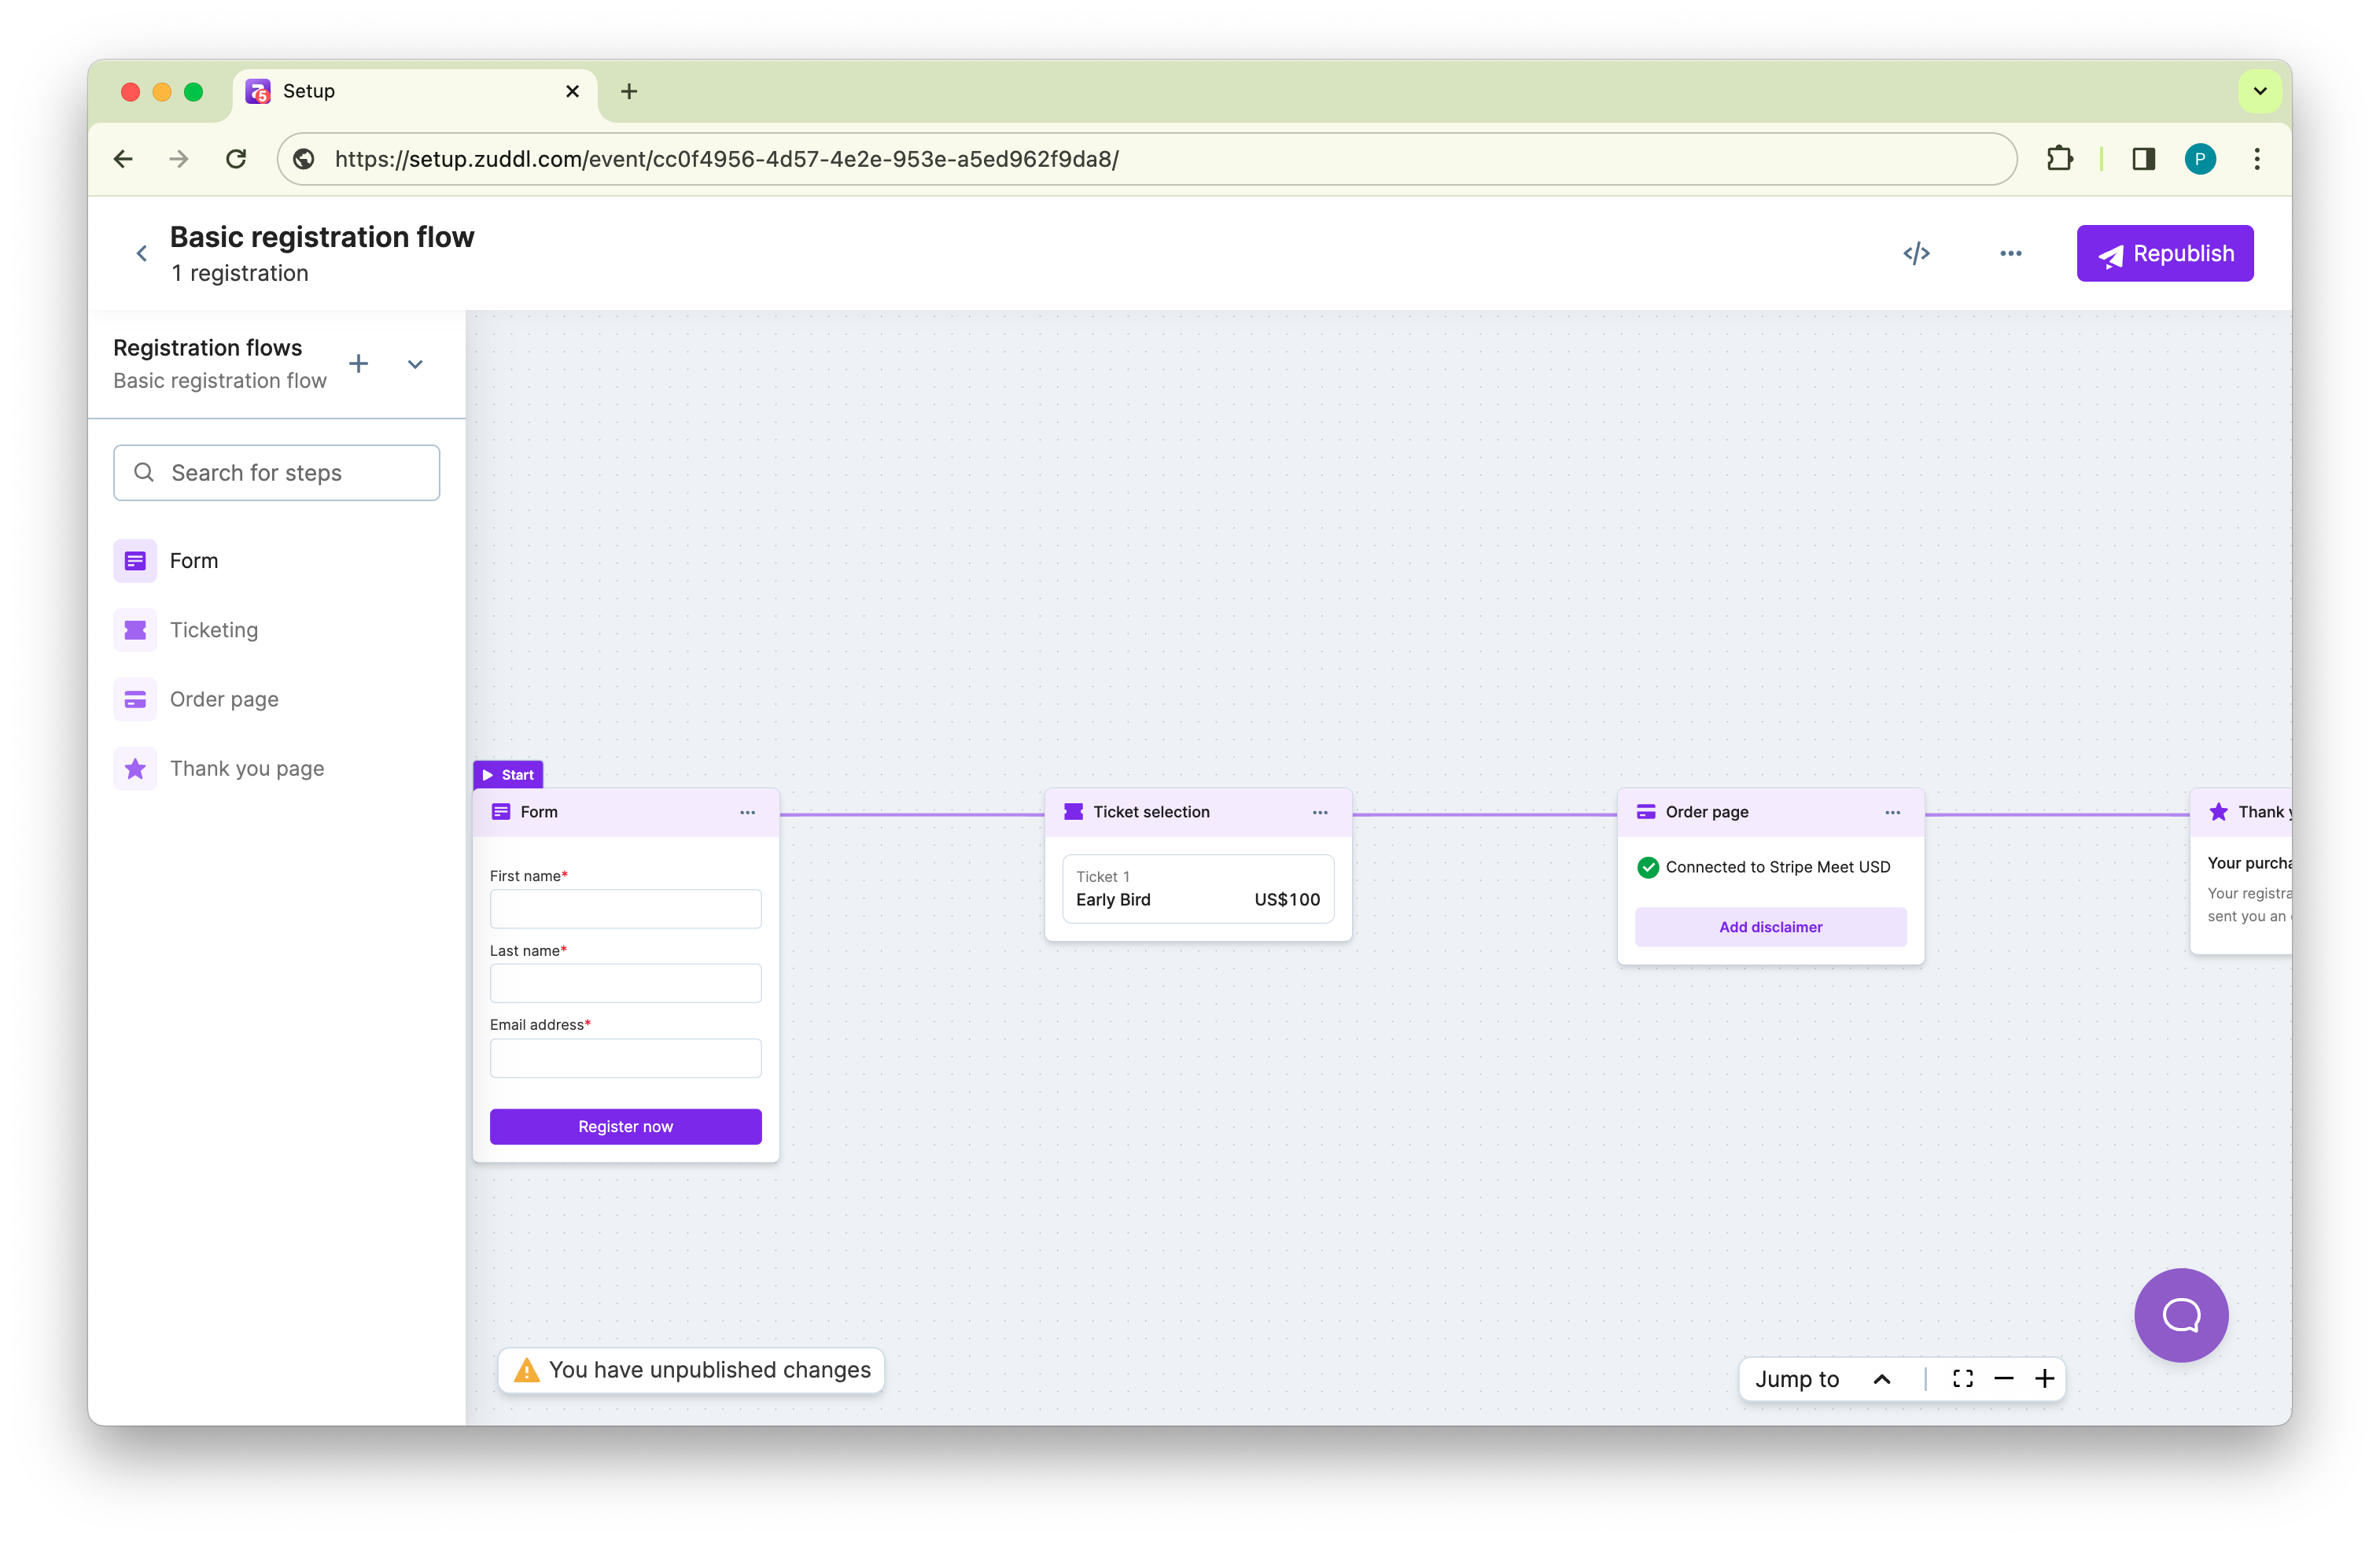
4. Set up the session calendar
Under Schedule, create main-stage keynotes, breakouts, and lunch slots. Each session becomes scannable in the mobile app and feeds attendance analytics once on-site.
5. Enable on-site check-in
Head to On-site Settings and turn on QR scanning plus badge printing. Pick a printer model (Brother or Zebra) and select a badge template—standard fold-over or lanyard style. Zuddl embeds the QR on every confirmation email.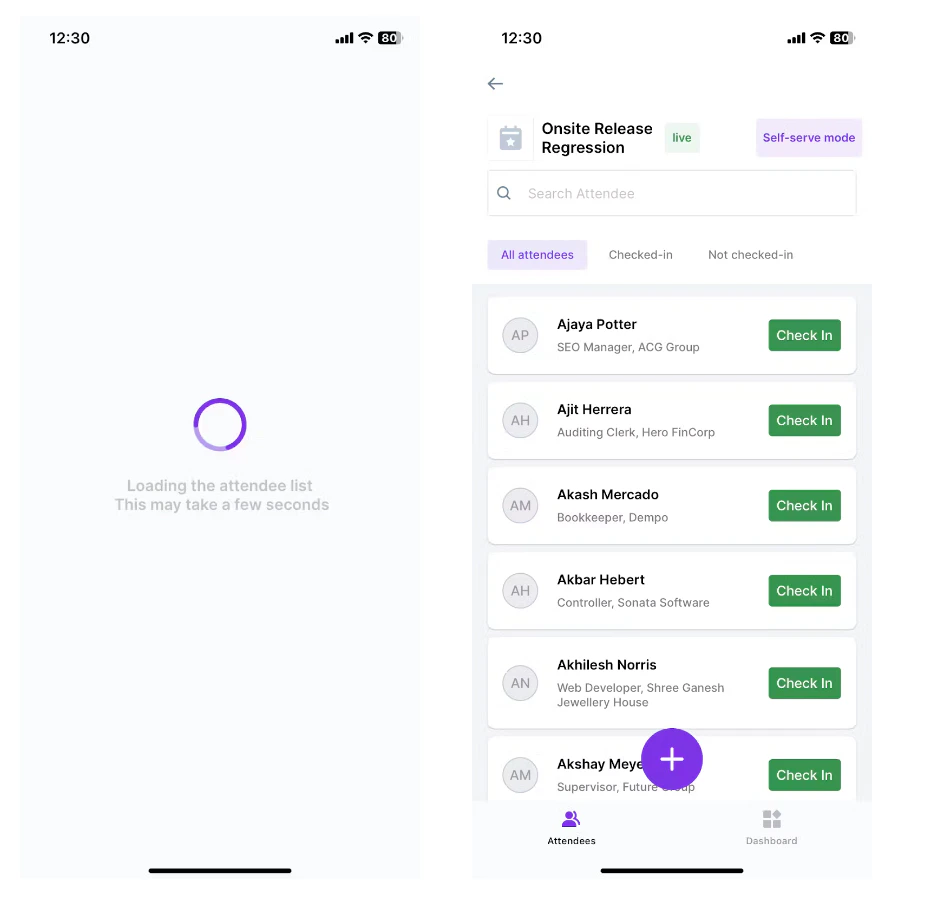
6. Design the badge
Inside the badge editor, pull in dynamic fields—name, company, and ticket tier—and add a subtle stripe for VIPs. A two-minute design pass now will save you sorting badge ribbons later.7. Set up the mobile app
In the Zuddl Event mobile app, upload your logo, select primary colour, and switch on agenda, speaker bios, and push notifications. Guests who scan the confirmation QR will be prompted to download the app for maps and real-time alerts.
8. Add gamification
If sponsor traffic matters, open Gamification and create a simple scavenger hunt: “Scan 5 booth QR codes to win a gift card.” Points and a live leaderboard keep energy up between sessions.