1. Add basic event details
The first step is to create a basic event with essential information. Create a new field event, set the date, venue address, and local time zone, and that’s it.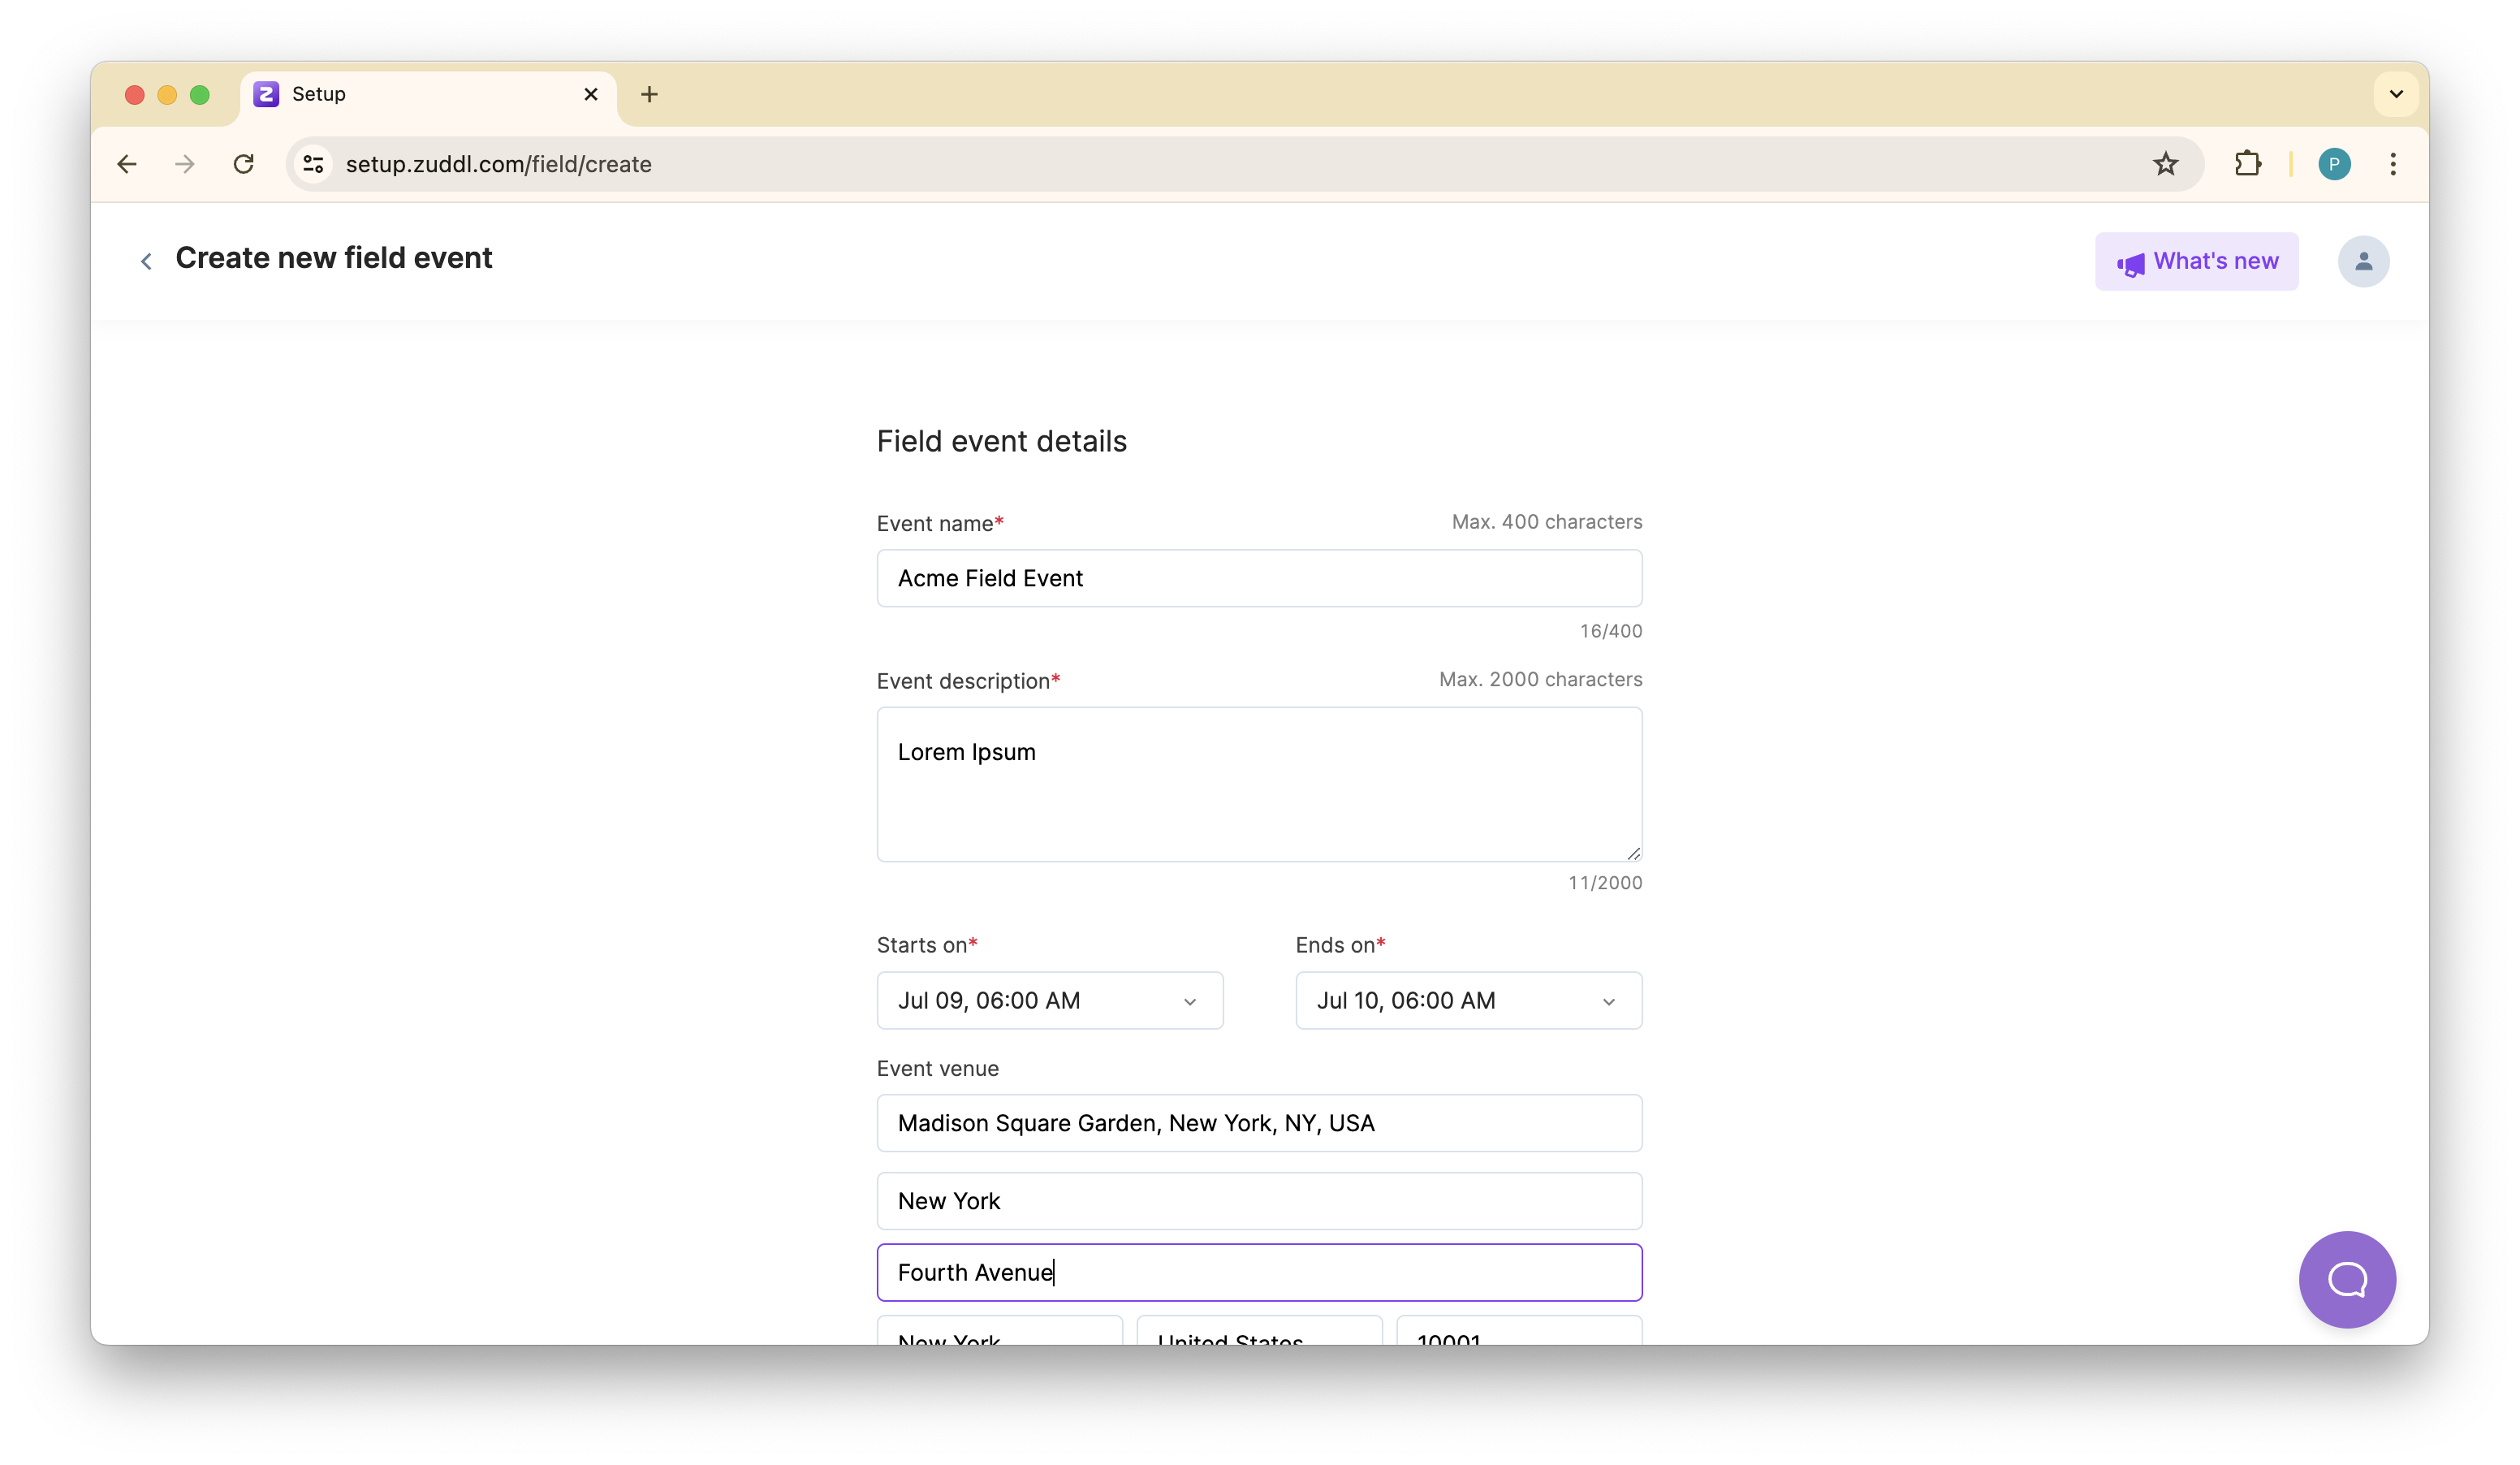
2. Brand the basics
Next comes branding. Under the Branding menu, you can upload an event logo, primary and secondary colors. These assets are applied to registration pages, confirmation emails, and onsite QR badges, ensuring every touchpoint looks like your brand and giving consistent visuals.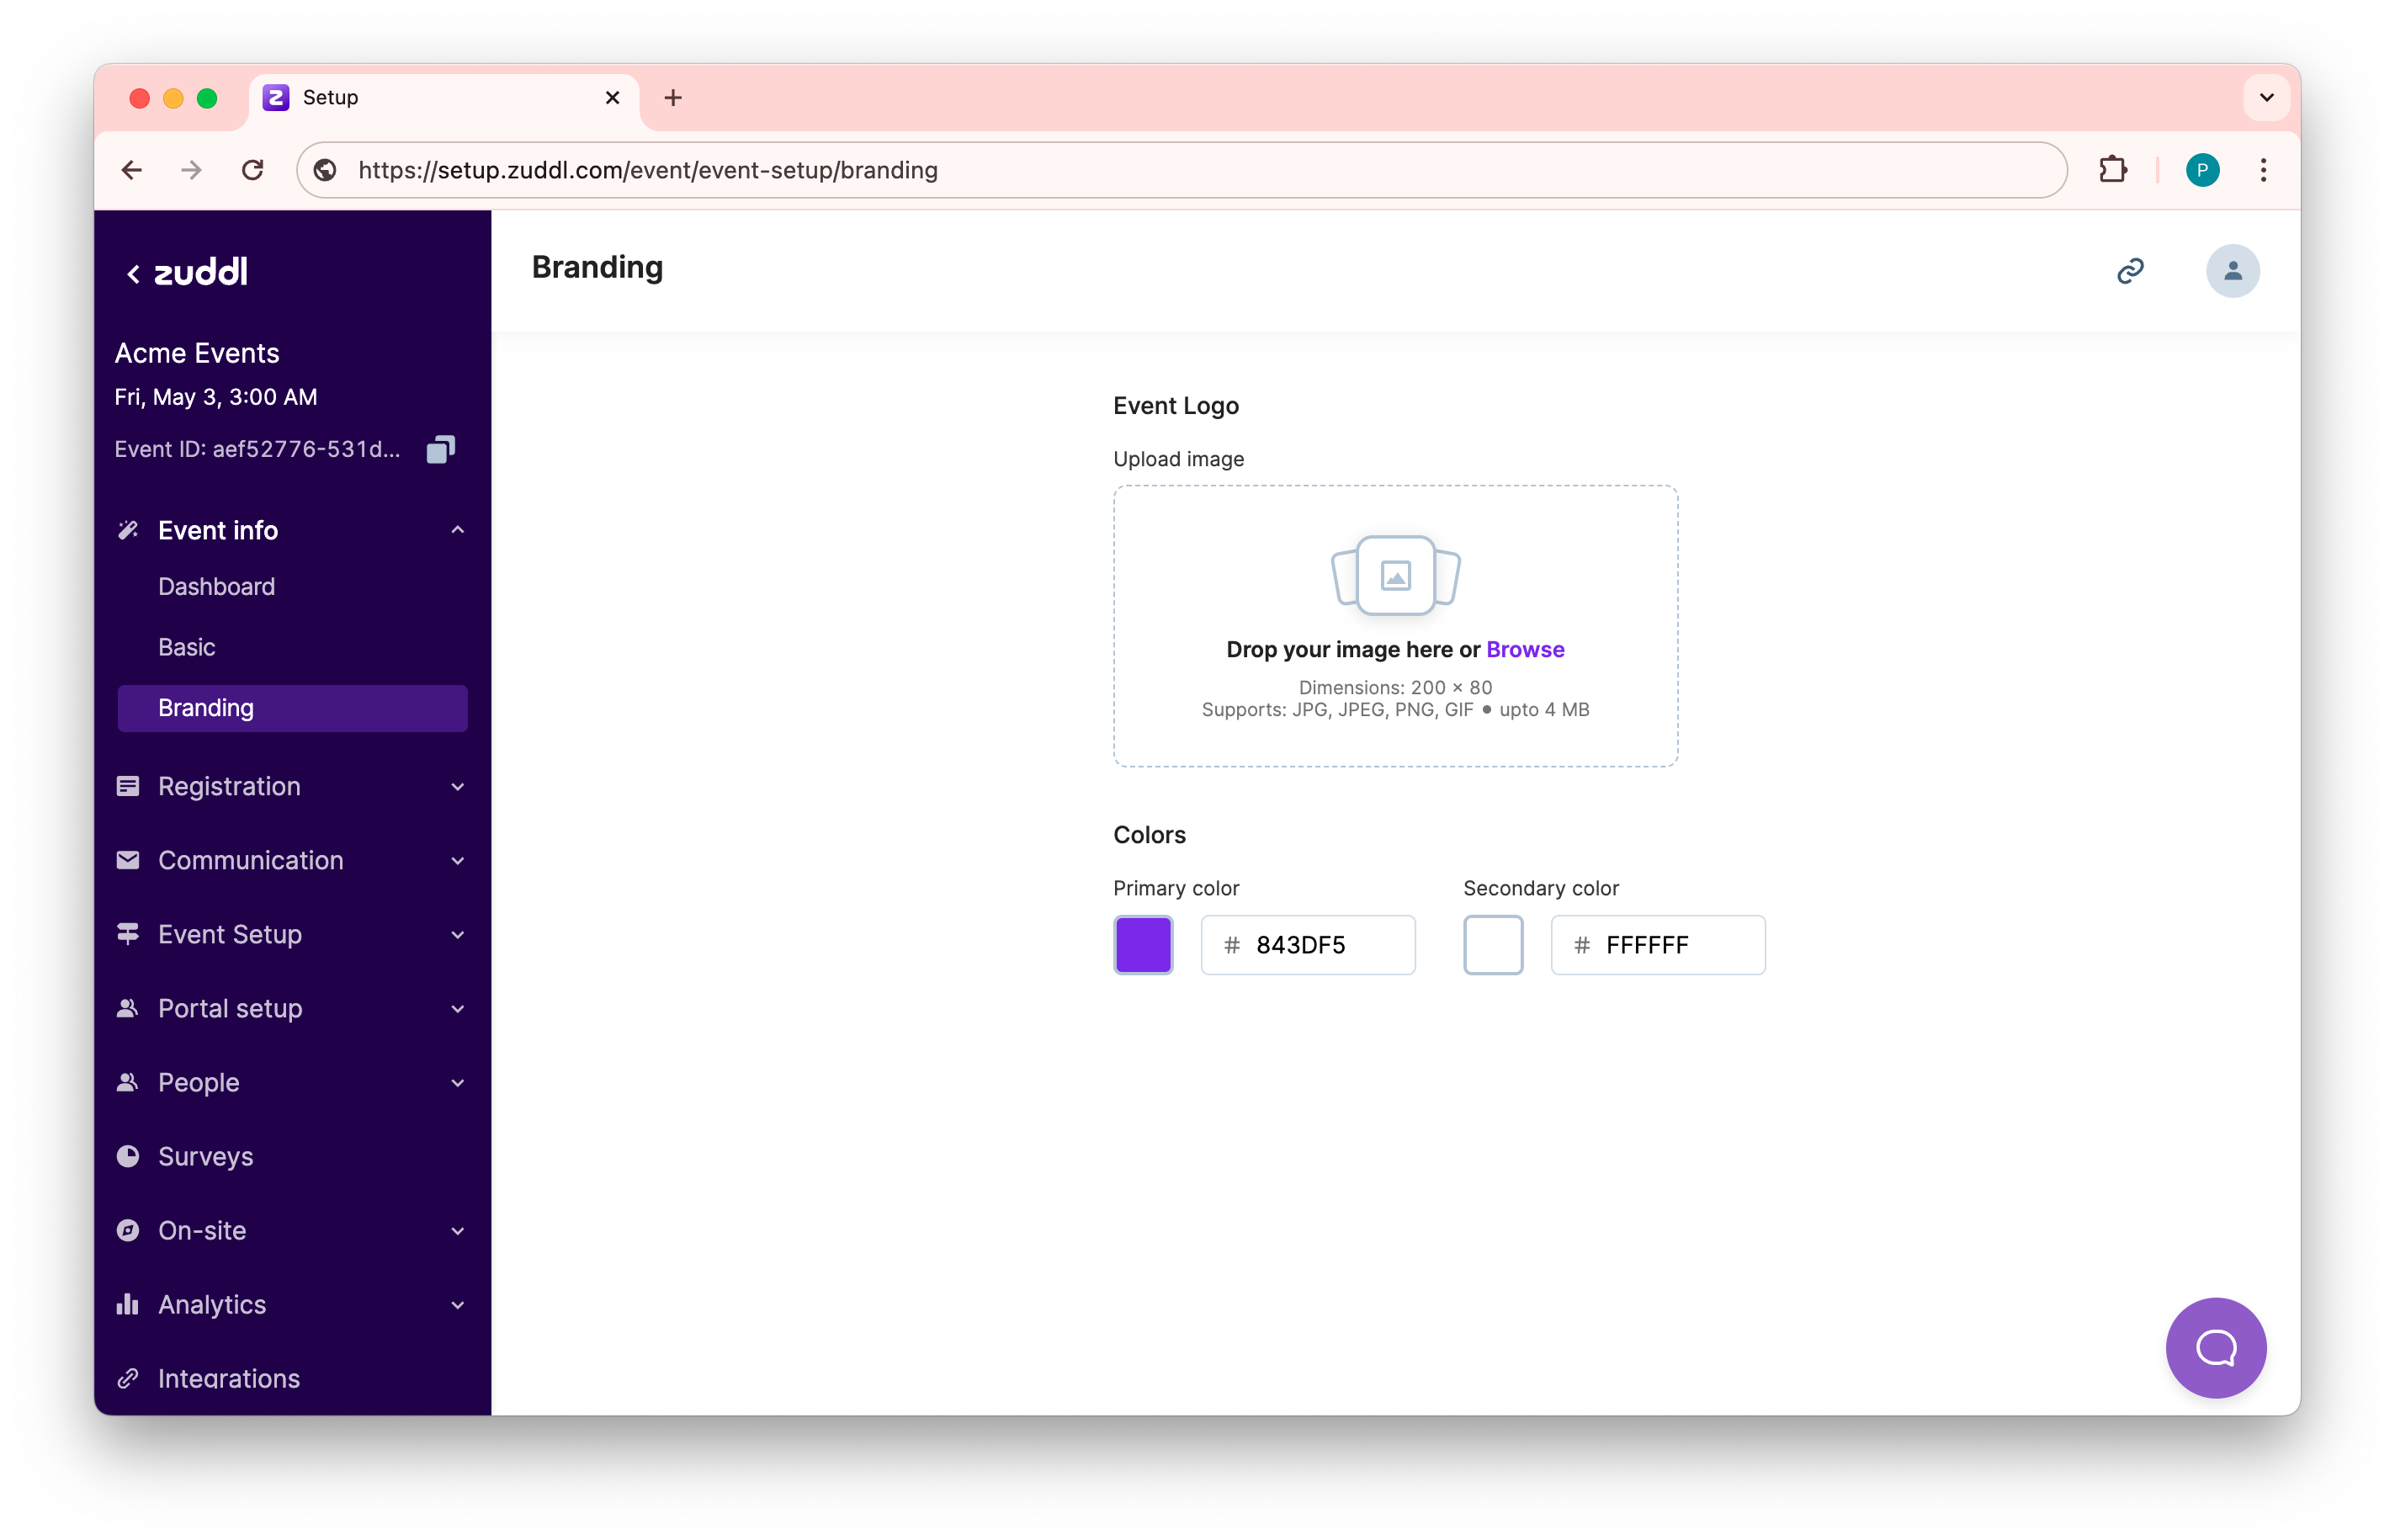
3. Streamline registration
Registration is one of the most critical and impactful parts of your event. With Zuddl flow builder, you can add your form fields, disclaimers, and other steps. You can also add branches to your registration flow and direct users through different routes based on specific criteria. Keep the registration form clean and easy for users to complete. If capacity is tight, set up an approval process; so decision makers can green-light VIPs.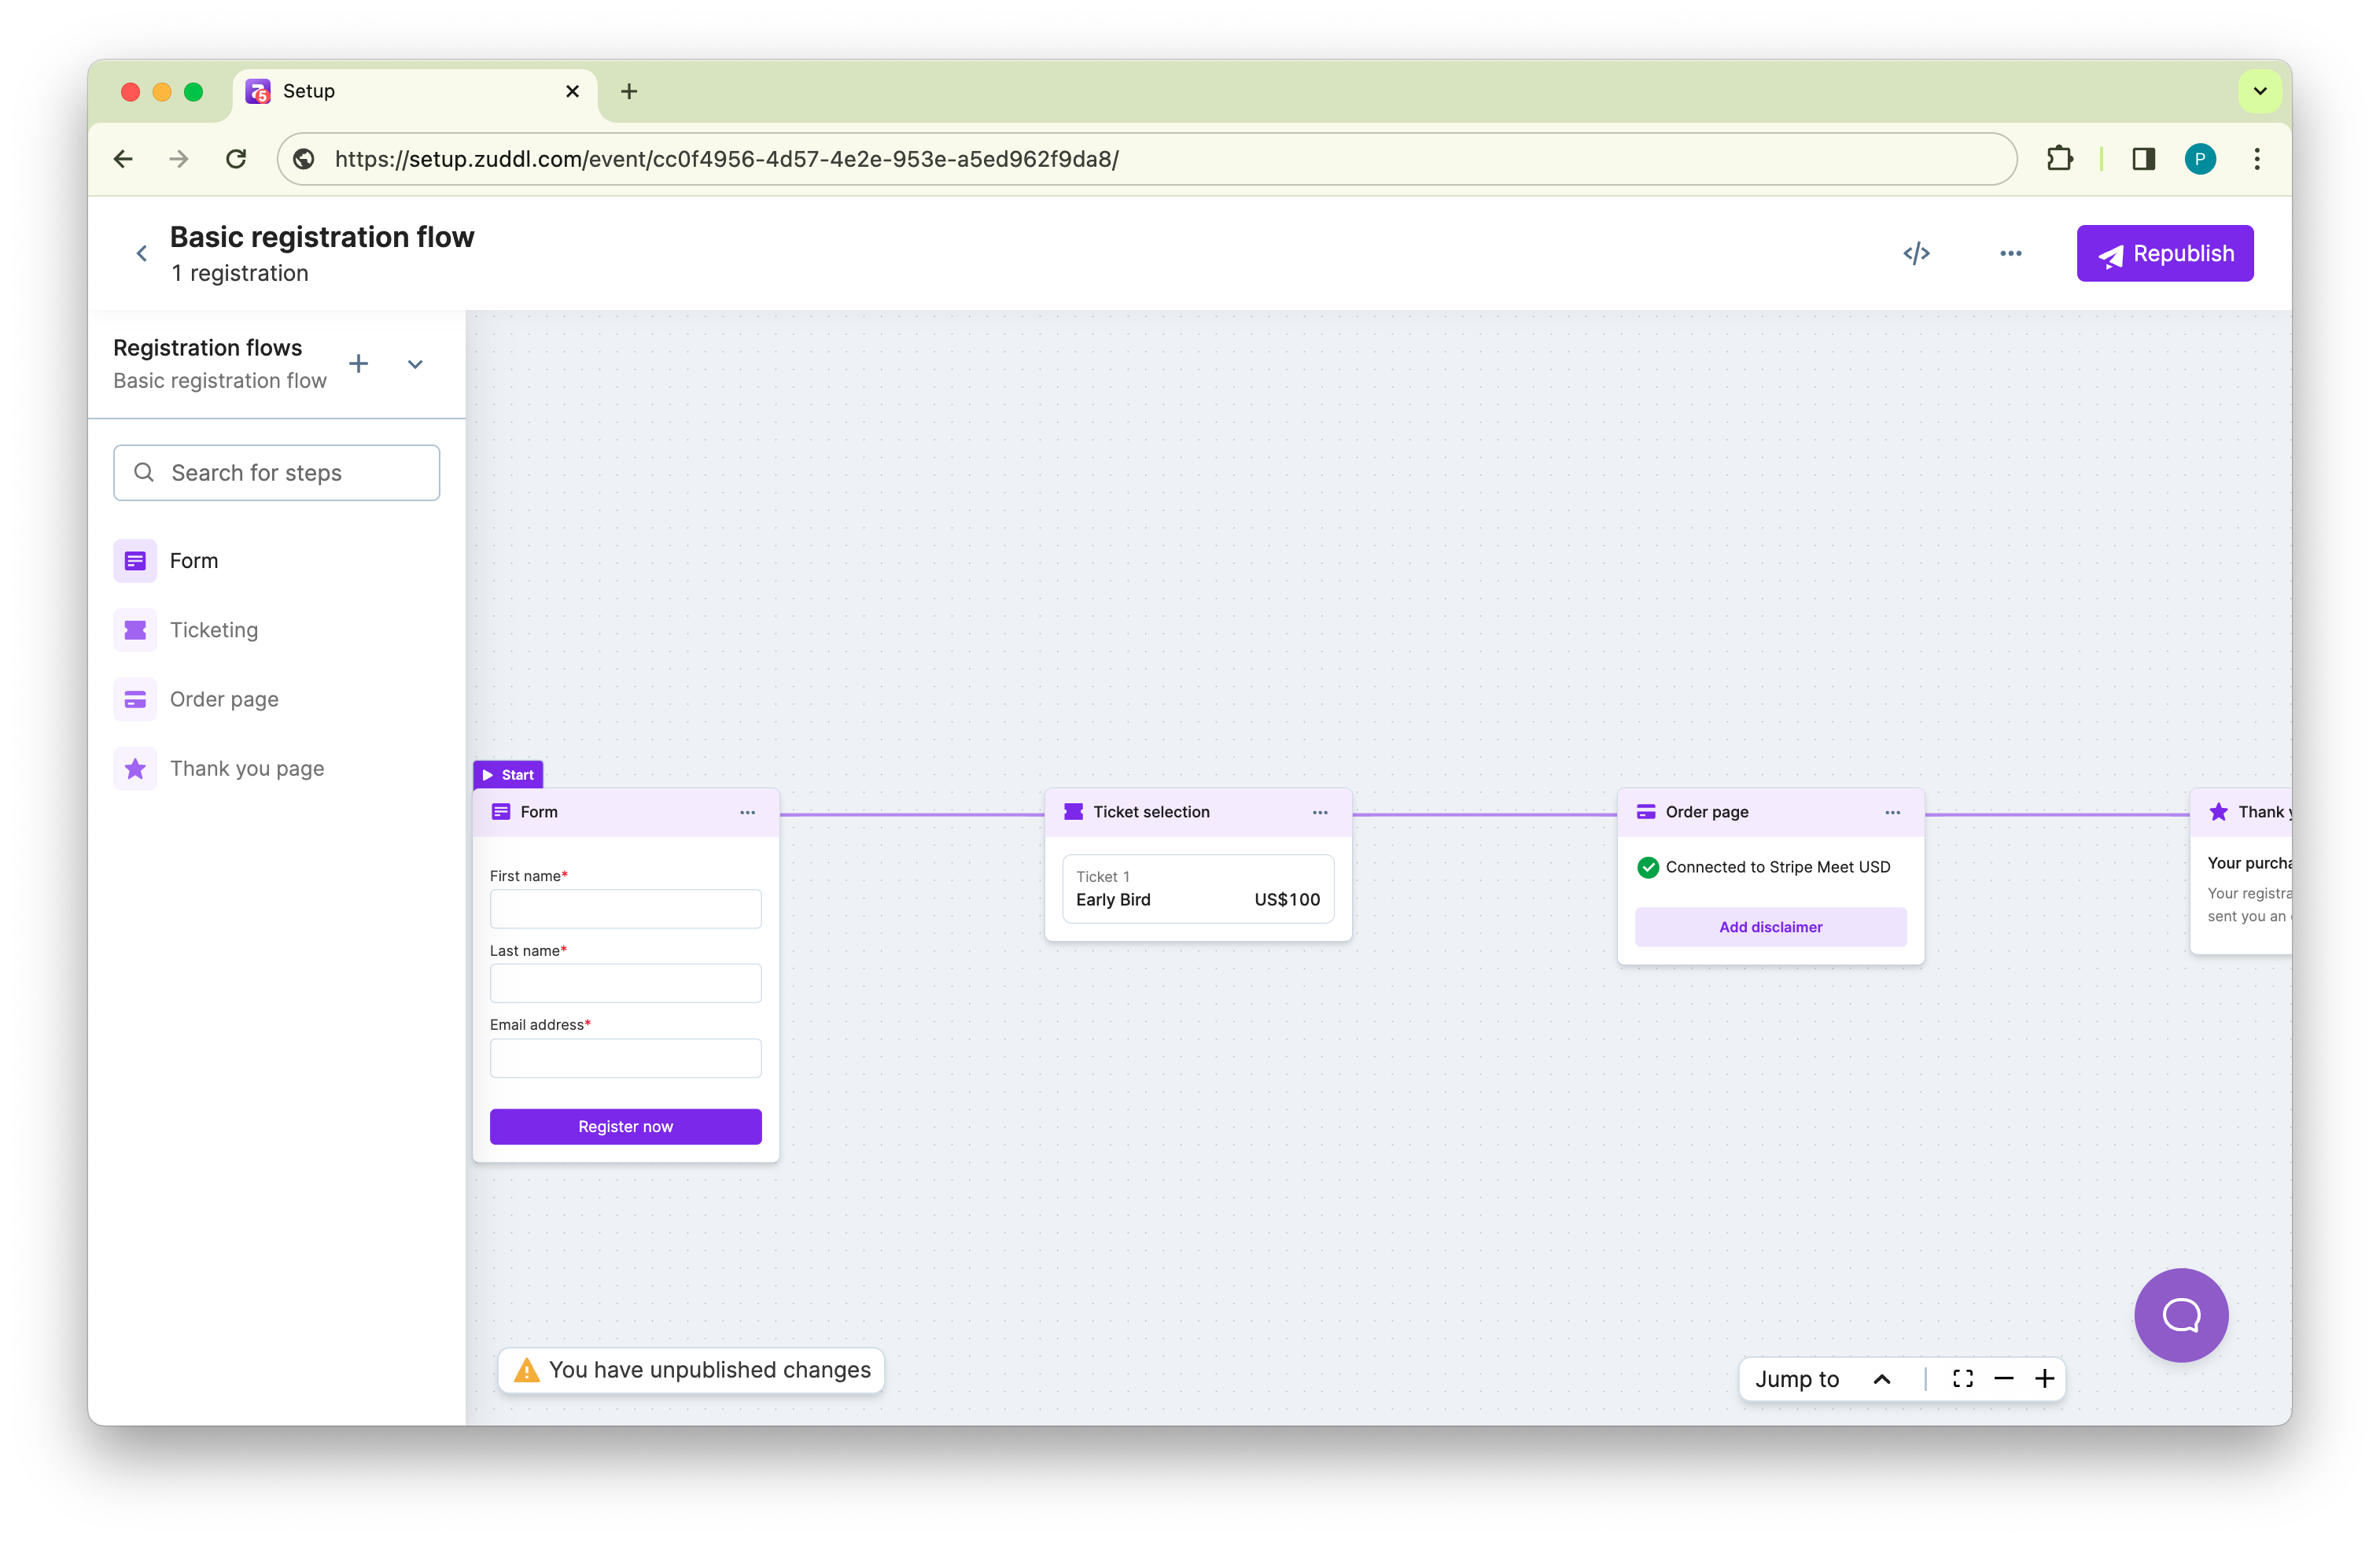
4. Automate confirmations and reminders
Under Communications, edit the pre-defined confirmation. Leave the registration confirmation email on; it includes a magic-link through which attendees can directly enter the event. You can also build your custom email for a more personalized experience.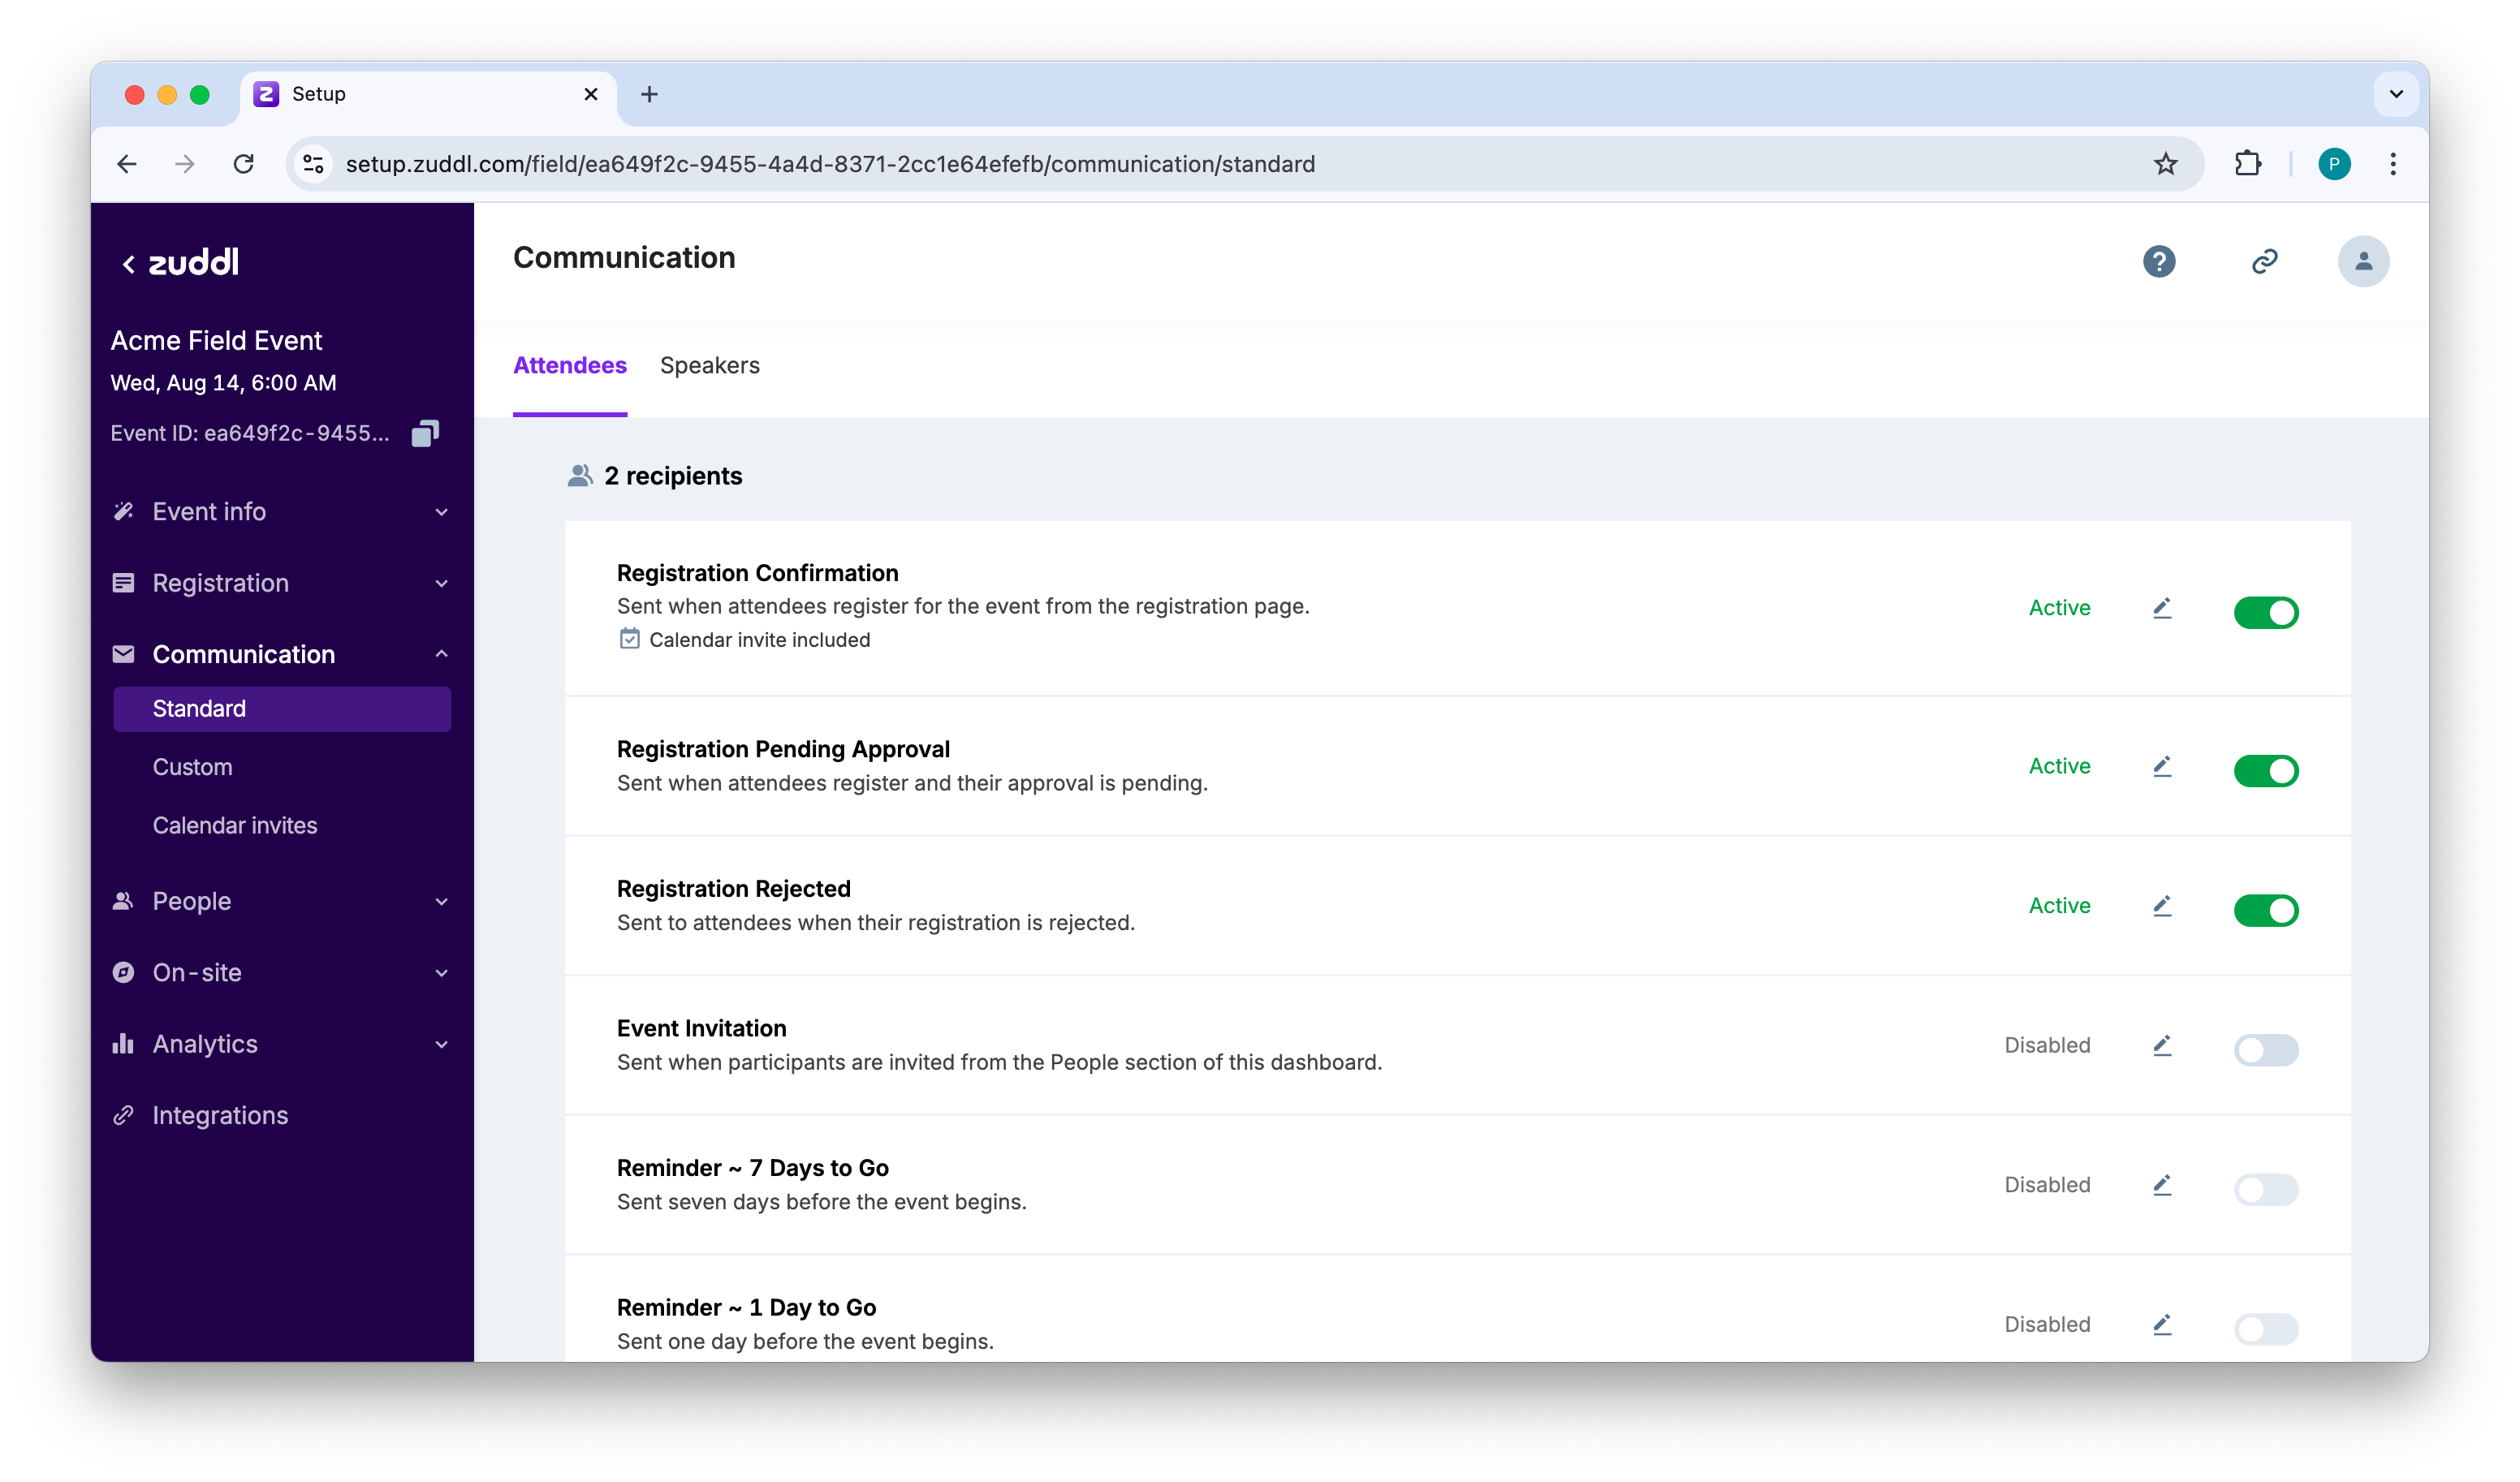
5. Prepare on-site ops
Download the Zuddl Lead Capture App on staff phones or tablets. Scanning a guest’s QR badge checks them in, logs their arrival time, and, if badge printing is enabled, triggers a badge print on a thermal printer.
6. Capture leads and feedback
Staff scan badges to tag interest level and type quick notes on the lead capture app that sync to the contact record.